
1
Did you know there are five ways to move, scale or rotate your model’s islands, verts, edges or polys while working in RizomUV?
-
-
- You can use the Tab-key: Select an element or more, and press TAB. It will call a transformation gizmo, allowing you to rotate, scale, and move in any editing mode.
- Use the Transform edit mode: Select one element or more, press F5 and the same transformation gizmo will appear around said selected elements
- Use the Space bar: After selecting one or more elements, hold down the Space bar and your Left, Middle, or Right Mouse button. This will let you Rotate, Scale, or Move your selection.
- Use the ‘D’ key: Place your mouse pointer over a given island, then press the D key plus one of the 3 mouse buttons, and you will be able to rotate, scale or move the respective island under the mouse pointer when working in any editing mode.
- Use the Transform panel’s options and values to fine tune your selected elements: Select some elements then change the values present in the panel.
-
2
Did you know that you don’t have to stick to Rizom’s native UV grids? You can load your own in File->Load Texture Map. If you want to tweak the tiling settings, you can do so in the Texture Mult. Panel to customise it to a T . If you want to make your own, we have just the tutorial here
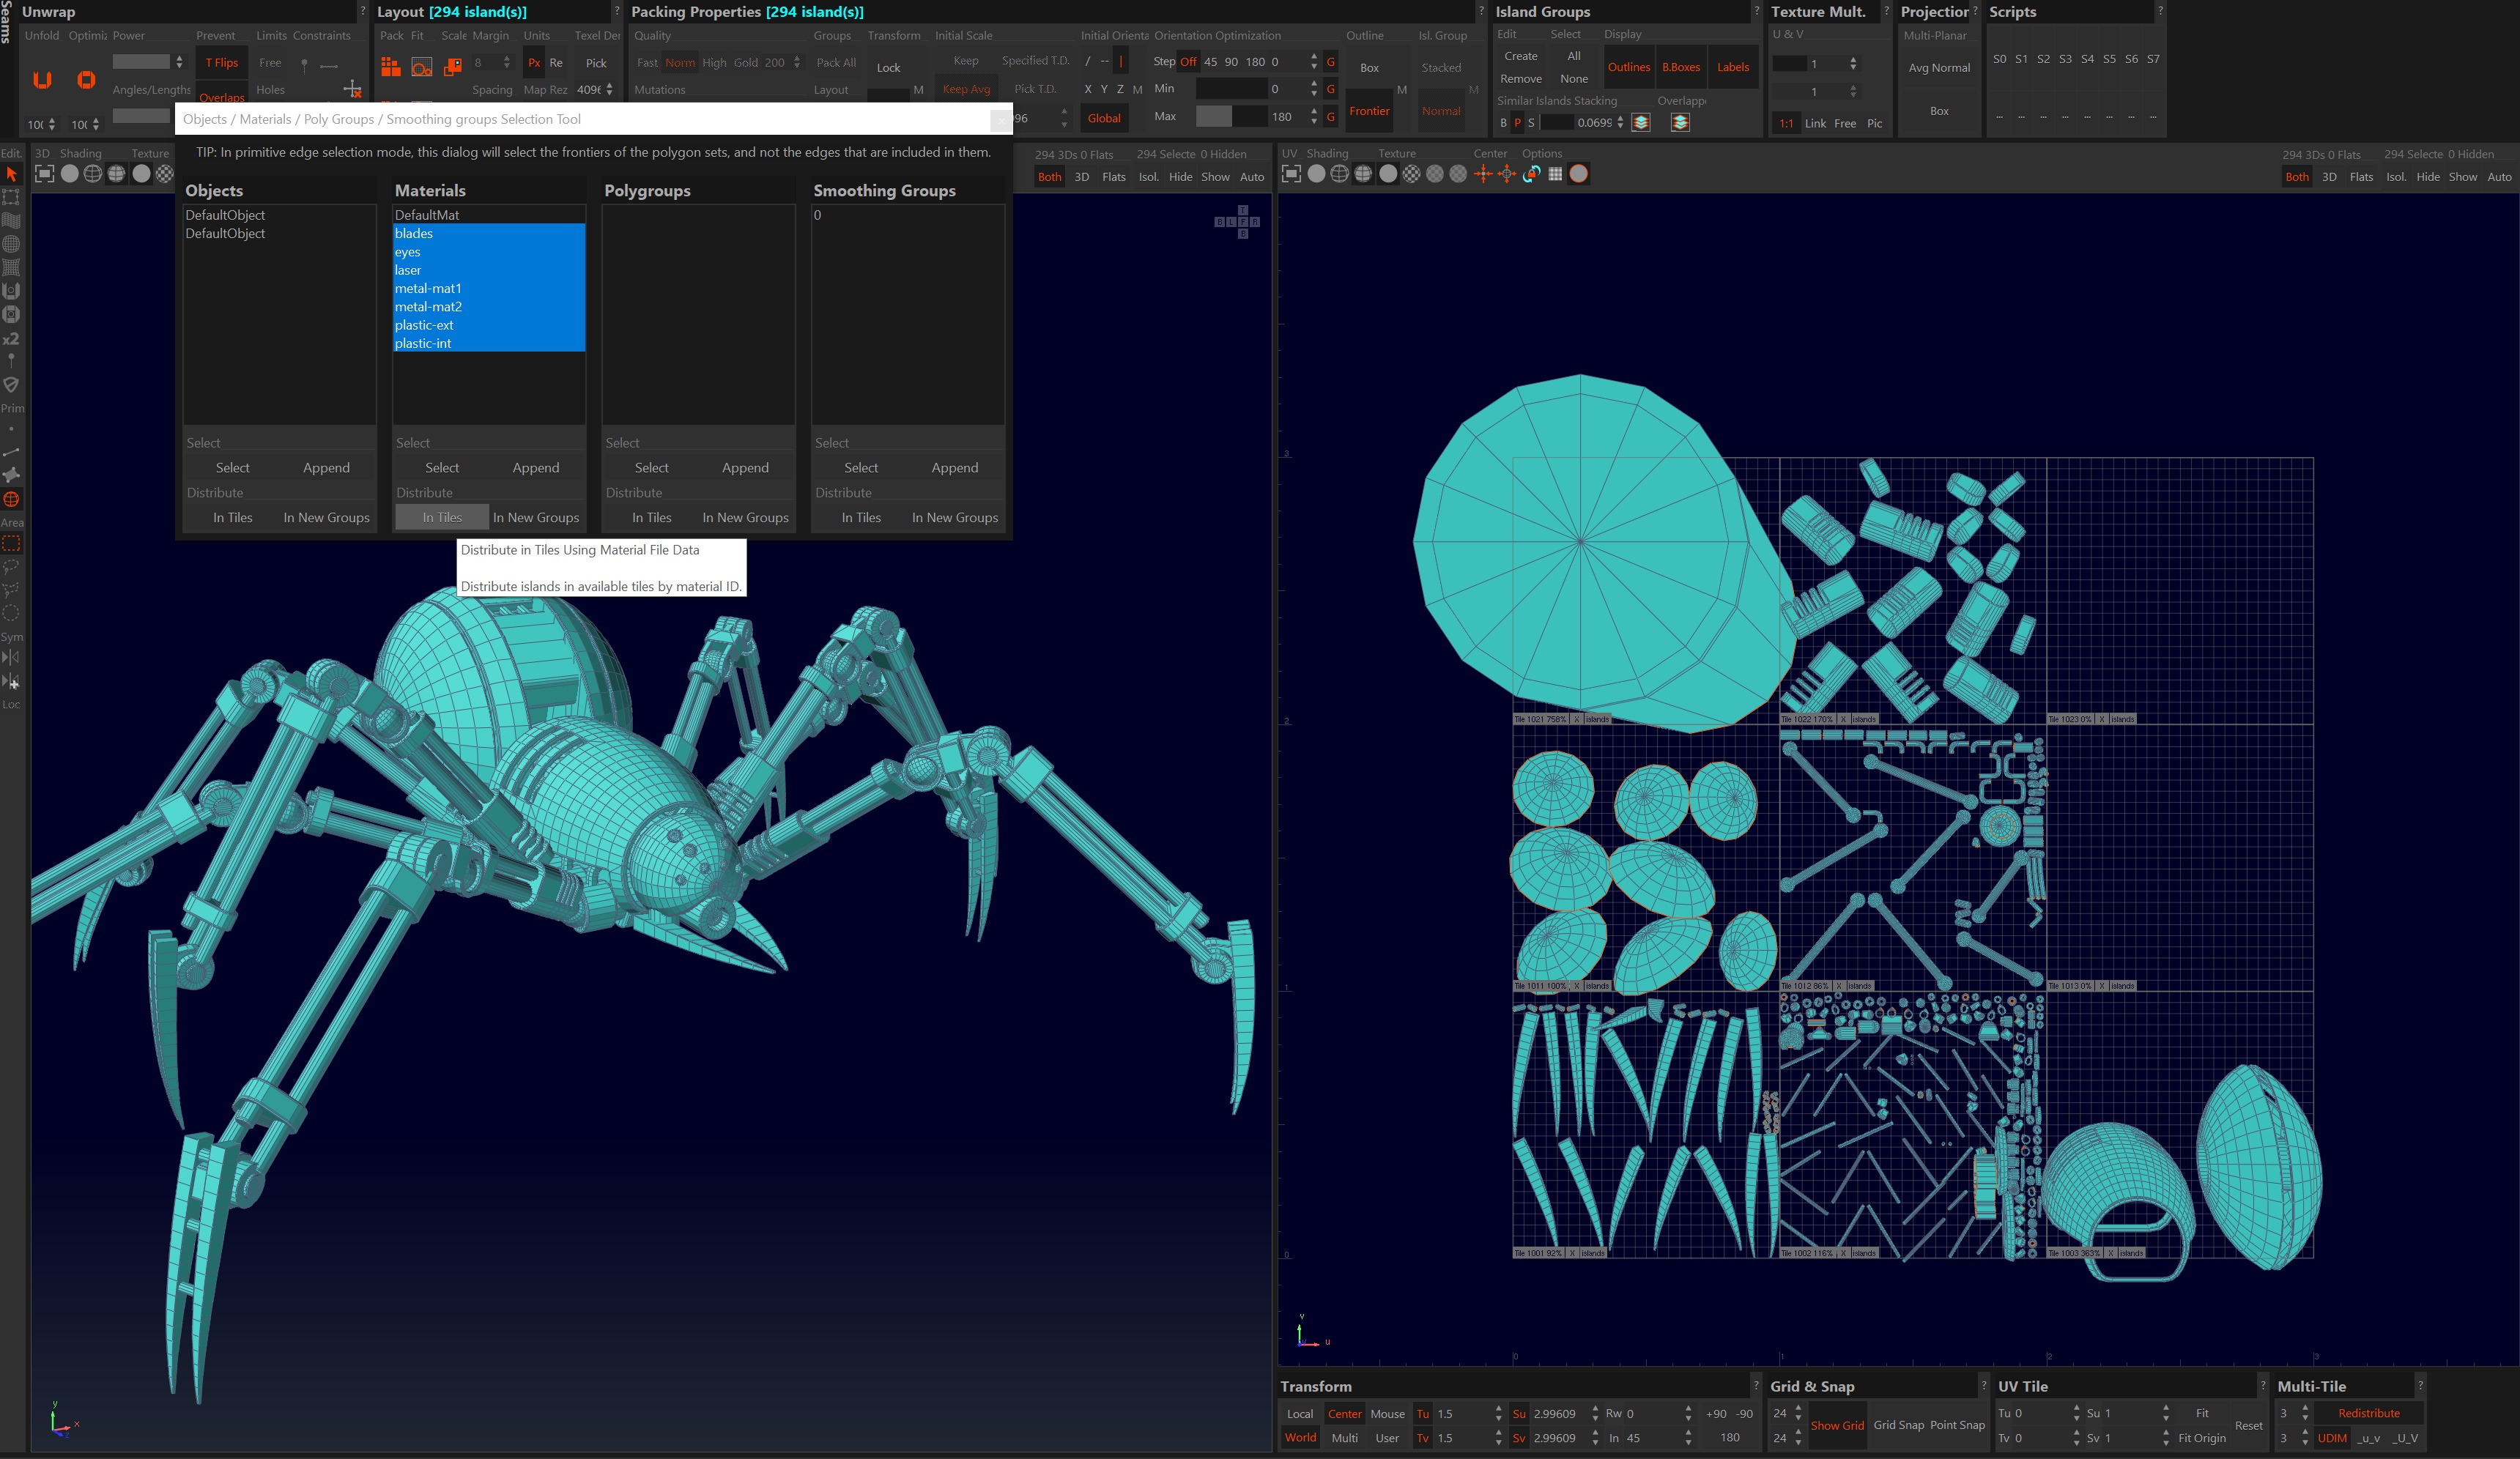
3Did you know that you can select the borders of Polygon groups, Smoothing Groups, or Materials groups? Switch to Edge Selection mode, then go to Menu->Select->Show Model Groups, then double click on the name of the group you want to their border be selected.
4Did you know that all numerical entry fields are evaluate mathematic expressions? It means that you can enter things like 2*39 or 1024/6 or even 3*(12 - 45 + (40+2) ) / 4
5
Did you know that you can lock tiles and then deny their content to be processed by the packing algorithm? When you have several tiles (UDIMs) select one tile by clicking on the tile name typically in the lower left of the tile. In the Packing Settings panel, click on “Lock”. You have to do this tile by tile, as the algorithm processes this on a tile-by-tile basis, so even if you have multiple tiles seleted, it will process only one.
6
Did you know that RizomUV is scriptable? A good way to start learning is to open the script and log window from Tools. It will log everything you do – and you can repeat actions by selecting and executing them, just like the Photoshop history panel (but with fewer icons and more coordinates)
7
Did you know you get get OCD-neat UVs by using the Align options? The best ones to use, especially on small, stacked islands, are Bottom or Right Align
8
Did you know RizomUV lets you stack overlapping, non-symmetrical islands? Handy for items with the same material, but not shape: Simply press Shift+Alt+G and it will group and stack your selection so it won’t rotate, move, or scale while the stack is active.
9
Did you know you dont have to tile your UDIMs by hand? The fastest and easiest way to put your model in tiles is to define the amount of tiles you need - one for each model, material or smoothing group in the Multitiles menu. Next, open the Show Model Groups dialog either in the Select Menu or in The Selection tools on the top right. Select all the groups you want tiled, press Select, and then In Tile. This will distribute all your selected groups into each their tile.
10
And finally, did you know that the easiest way to put your model groups into RizomUV groups is to keep the groups from step 9 selected, and then pressing "In New Groups"? This will put everything into non-exportable, Rizom-native groups for a much easier and tidier workflow!
Share this Post